Outlook User Connector
Connect your own Outlook mailbox and calendar to Abacus.AI so that ChatLLM Teams chats with RouteLLM, the Abacus AI Agent and Custom Chatbots can read your mail and calendar, and, if your administrator allows it, send mail and create events, under your own identity.
Microsoft blocks ordinary users from consenting to the Abacus.AI app on their own. Before anyone else in your tenant can connect Outlook, a Microsoft Entra admin must create the connector once and tick the "Consent on behalf of your organization" checkbox on Microsoft's Permissions requested screen, then click Accept.
This is not the same as the Grant admin consent button in the Entra admin center. Once the admin has ticked the checkbox, every user in that tenant can sign in and create their own connector freely. Until then Microsoft stops them with "Need admin approval".
See Microsoft Entra Tenant Consent for the full walkthrough.
Prerequisites
- Access to ChatLLM Teams
- A Microsoft 365 account with an Outlook mailbox
- To change scopes or use your own Entra app: administrative access in Abacus.AI to create connectors
Scopes and permissions
By default the Outlook user connector is provisioned with read-only access to keep your communications secure. If your workflow needs to send emails or create calendar events, an organization administrator must explicitly select the write scopes on a config connector. Every user-level Outlook connection in the organization inherits the scopes stored there.
Set scopes from the platform
- In the Abacus.AI interface, click your profile picture in the top right corner and select Manage Connectors (or open the Connected Services Dashboard).
- Click Add New Connector and choose Outlook from the list.
- Turn the Config Only toggle on.
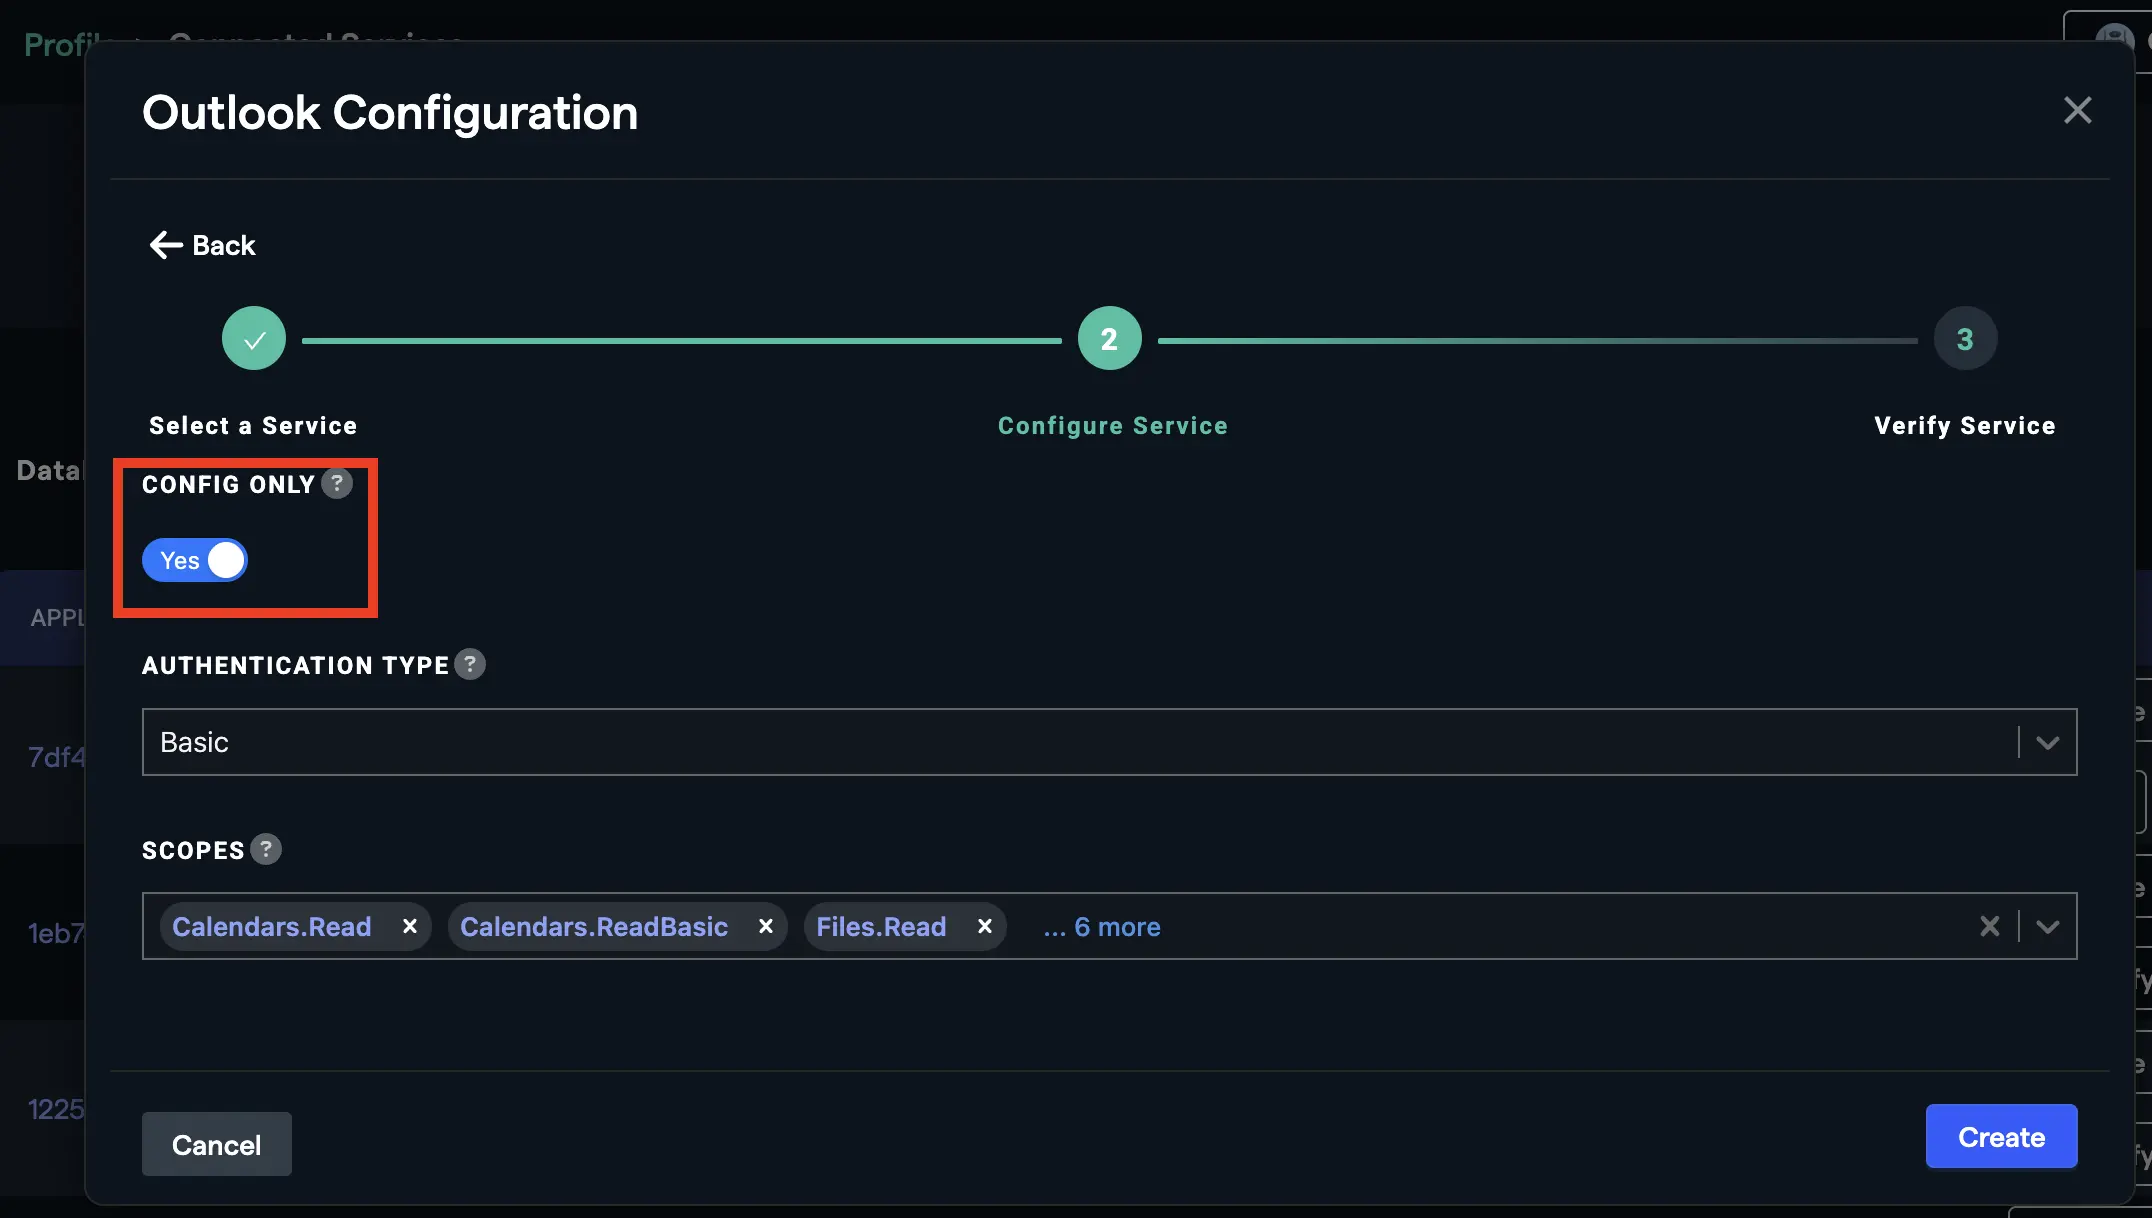
Always enable the Config Only toggle here. Without it, the form creates an organization-level Outlook connection to your own mailbox, and other users would gain access to it.
- Select the scopes you want users to be granted. Leave the defaults for read-only access, or add
Mail.Send,Mail.ReadWriteorCalendars.ReadWritefor sending mail and writing calendar events. - Click Create. The configuration does not require an Outlook sign-in. If you are prompted to Connect Outlook, the Config Only toggle is off; review the previous steps.
Users who connected Outlook before the change must reconnect it from Profile → User Connectors for the new scopes to take effect.
Use your own Entra app (Custom OAuth)
By default the connector uses the Abacus.AI application registration. To use your organization's own Microsoft Entra app instead:
- Register an app in Microsoft Entra following the Microsoft documentation. Add the redirect URI
https://abacus.ai/oauth/callback, and grant it the delegated permissions your users need. - Follow the Set scopes from the platform steps above, and in the config connector form enter your app's Client ID, Client Secret and Tenant ID in the
CLIENT ID,CLIENT SECRETandTENANT IDfields. - Click Create.
Your own app registration still needs admin consent for its delegated permissions, granted from App registrations → your app → API permissions → Grant admin consent.
Delegated permissions reference
The connector requests the following Microsoft Graph permissions. All of them are delegated permissions, consented to by each signed-in user, so the connector can never read more than the user could.
| Permission | Purpose |
|---|---|
Mail.Read, Mail.ReadBasic, Mail.Read.Shared | Read the user's mail and shared mailboxes |
Mail.ReadWrite, Mail.ReadWrite.Shared | Read and write mail (write scopes, off by default) |
Mail.Send, Mail.Send.Shared | Send mail as the user or on behalf of others (off by default) |
MailboxFolder.Read, MailboxFolder.ReadWrite, MailboxItem.Read | Read (and write) mailbox folders and items |
MailboxSettings.Read, MailboxSettings.ReadWrite | Read (and write) mailbox settings |
Calendars.Read, Calendars.ReadBasic, Calendars.Read.Shared | Read the user's calendars and shared calendars |
Calendars.ReadWrite, Calendars.ReadWrite.Shared | Create and update calendar events (off by default) |
Files.Read | Read user files (attachments) |
User.Read, User.ReadBasic.All | Sign in and read the user's profile and basic profiles of others |
offline_access | Maintain access without asking the user to sign in again |
Use Outlook in ChatLLM
Step 1 — Connect Outlook
In ChatLLM Teams, click the Connectors link on the home page, or click your profile in the top right and navigate to Profile → User Connectors.
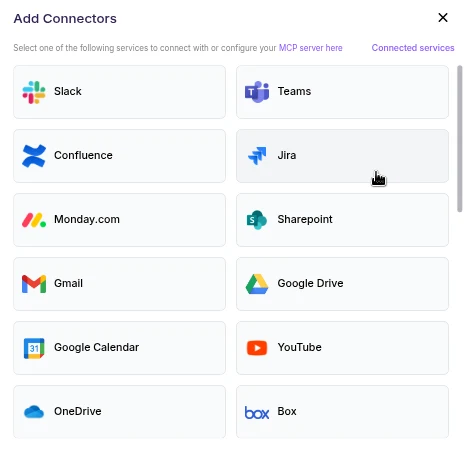
- Scroll the connector list and click Outlook.
- A browser pop-up opens asking you to sign in to Outlook and authorize Abacus.AI.
- Review the requested permissions and click Allow (or Authorize).
- After authorization completes, Outlook appears under your connected services and is ready to use.
User connectors are configured once per user and run under your own identity. After the connector is set up, every chatbot and the Abacus AI Agent in your workspace can query data from it.
Step 2 — Chat with RouteLLM
- Open a new chat in ChatLLM Teams.
- From the model selector, choose RouteLLM (
route-llm). RouteLLM automatically routes each request to the most suitable underlying model, and is available for unlimited use to ChatLLM subscribers.
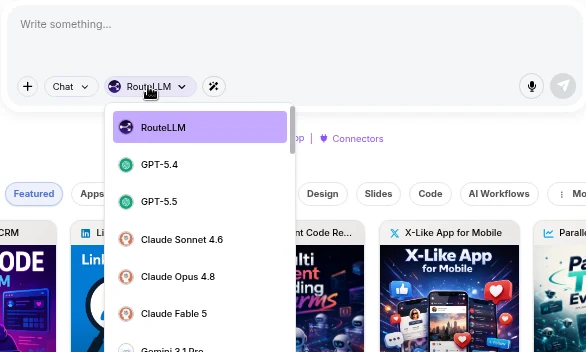
- Ask a question that references Outlook, for example "Summarize my unread Outlook emails". RouteLLM invokes the Outlook tool, fetches the data under your identity, and responds in chat.
The first time you query a newly connected service in a chat, you may be prompted to authorize the connector. Complete the sign-in once and the request continues automatically; subsequent requests reuse the connection.
You don't need to train a Custom Chatbot to use Outlook with RouteLLM. Once the connector is configured in the User Connectors panel, it is immediately available across your workspace chats and to the Abacus AI Agent.
If you want a dedicated bot with its own instructions and a restricted set of tools, train a Custom Chatbot in the Developer Platform and, under Advanced Options → Tool Use, select Outlook_tool. If you created a config connector, also pick it under **Config Connectors** so the chatbot requests the same scopes or uses your own Entra app. End users of that chatbot are prompted to sign in to Outlook once, and the bot then acts under each user's own identity. See the Custom Chatbots guide for the full training and deployment walkthrough.
Troubleshooting
- "Need admin approval" when connecting: the tenant consent step has not been done yet. Ask a Microsoft Entra admin to follow Microsoft Entra Tenant Consent.
- Error
AADSTS50105: your administrator has configured the applicationabacus_outlook_user_connectorto block users unless they are explicitly assigned to it. In the Azure Portal go to Microsoft Entra ID → Enterprise applications, search forabacus_outlook_user_connector, open Users and groups → Add user/group, select the users or groups and click Assign. - Sending mail or creating events fails: the write scopes are not granted. An administrator must add them on the config connector, and you must reconnect Outlook from Profile → User Connectors.
- Prompted to "Connect Outlook" while creating the config connector: the Config Only toggle is off. Turn it on before clicking Create.